
Tired of tripping over rakes, shovels, and garden tools every time you step into your shed or garage? This DIY wall-mounted yard tool organizer is the perfect solution!
With easy-to-follow plans, minimal materials, and a few tools, you’ll have your yard essentials neatly stored and always within reach. Plus, this organizer doesn’t just save space—it saves time and frustration!
Supplies Needed
Wood Boards:
-
(3) 1 1/2" x 3 1/2" x 8' boards (common 2x4) — approximately 38 mm x 89 mm x 2438 mm.
Fasteners:
-
2 1/2" Kreg pocket hole screws — approximately 64 mm.
Adhesives:
-
Wood glue.
Additional Tools:
-
Drill with pocket hole jig.
-
Table saw.
-
Measuring tape.
-
Screwdriver.
-
Kreg 90-degree pocket hole driver (optional for precision).
Cut List
Panels:
-
(4) Panel Tops and Bottoms: 27" (686 mm) each.
-
(4) Panel Sides: 27" (686 mm) each.
Base:
-
(1) Base: 27" (686 mm) long with a 5-degree bevel on one long edge.
Dividers:
-
(5) Dividers: 6" (152 mm) long, each with a 5-degree miter cut on one end.
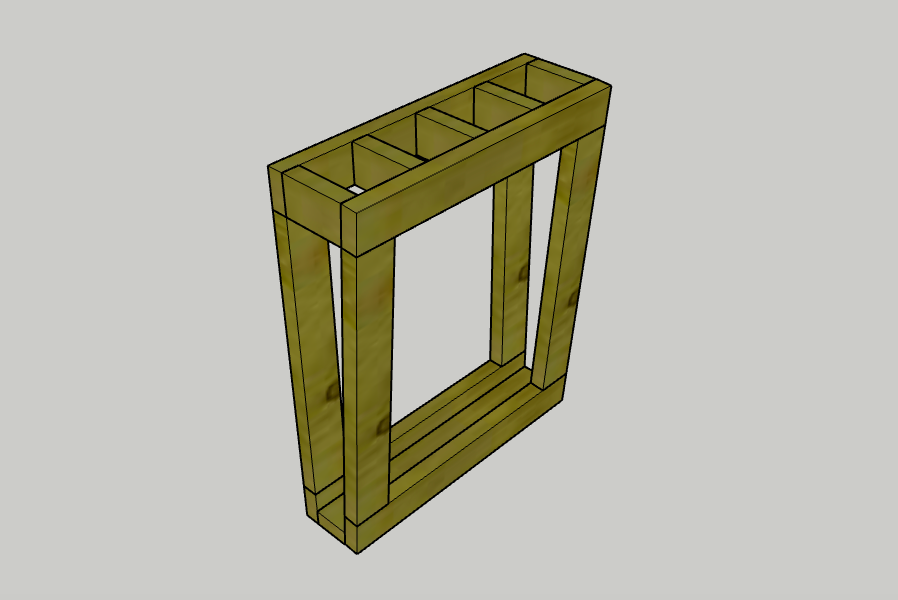
Step-by-Step Instructions
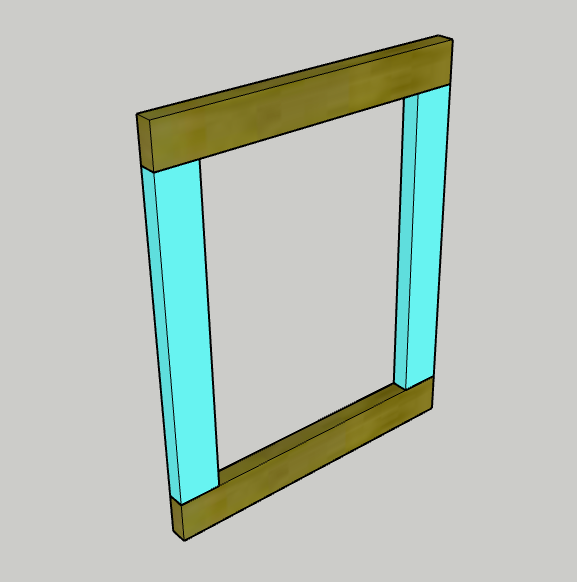
Step 1: Build Two Panels
-
Drill two pocket holes into each end of the four Panel Sides.
-
Use wood glue and 2 1/2" (64 mm) pocket hole screws to attach two Panel Sides to the ends of one Panel Top.
-
Attach a Panel Bottom to the other ends of the Panel Sides.
-
Repeat these steps to create a second identical panel.
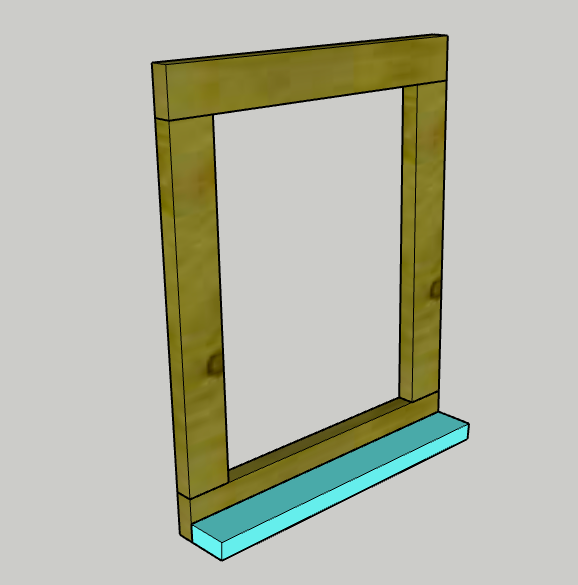
Step 2: Attach the Base
-
Use a table saw to cut a 5-degree bevel along one long edge of the Base.
-
Drill three pocket holes along each long edge of the Base (on the shorter side created by the bevel).
-
Position the flat side of the Base against the bottom edge of one Panel Bottom.
-
Secure the Base with wood glue and 2 1/2" (64 mm) pocket hole screws.
Step 3: Attach Dividers
-
For each Divider, cut a 5-degree miter on one end.
-
Drill two pocket holes into each end of the Dividers.
-
Attach the flat side of the first two Dividers to each end of the Panel Top using wood glue and screws.
-
Add the center Divider and then space the remaining two Dividers equally between the center and the ends.
-
Note: You can adjust the spacing to fit specific tools.
-
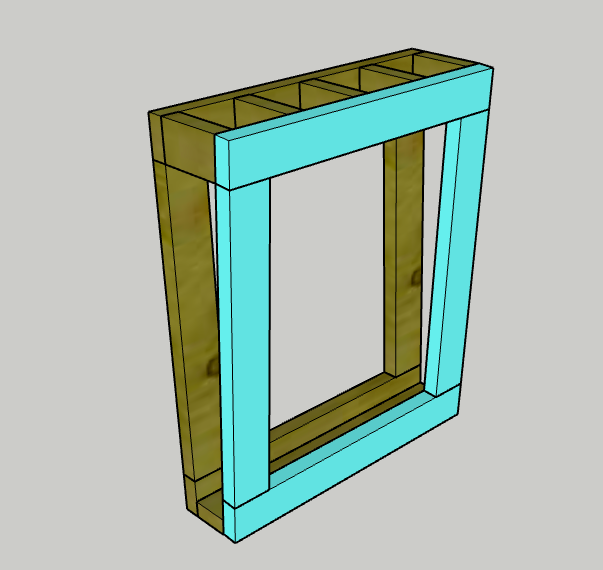
Step 4: Attach the Second Panel
-
Lay out the second panel.
-
Spread wood glue on the ends of each Divider and along the Base.
-
Align the second panel over the assembly and secure the Base to the second Panel Bottom using screws.
-
Secure each Divider to the second panel, ensuring alignment.
-
Tip: Use the Kreg 90-degree pocket hole driver for tight spaces.
-
Step 5: Install on Wall
-
Locate the studs in the wall where you want to mount the organizer.
-
Use 2 1/2" (64 mm) screws to attach the organizer securely to the studs.
-
Ensure the organizer is level before tightening the screws.
Final Step: Enjoy Your Organizer


