
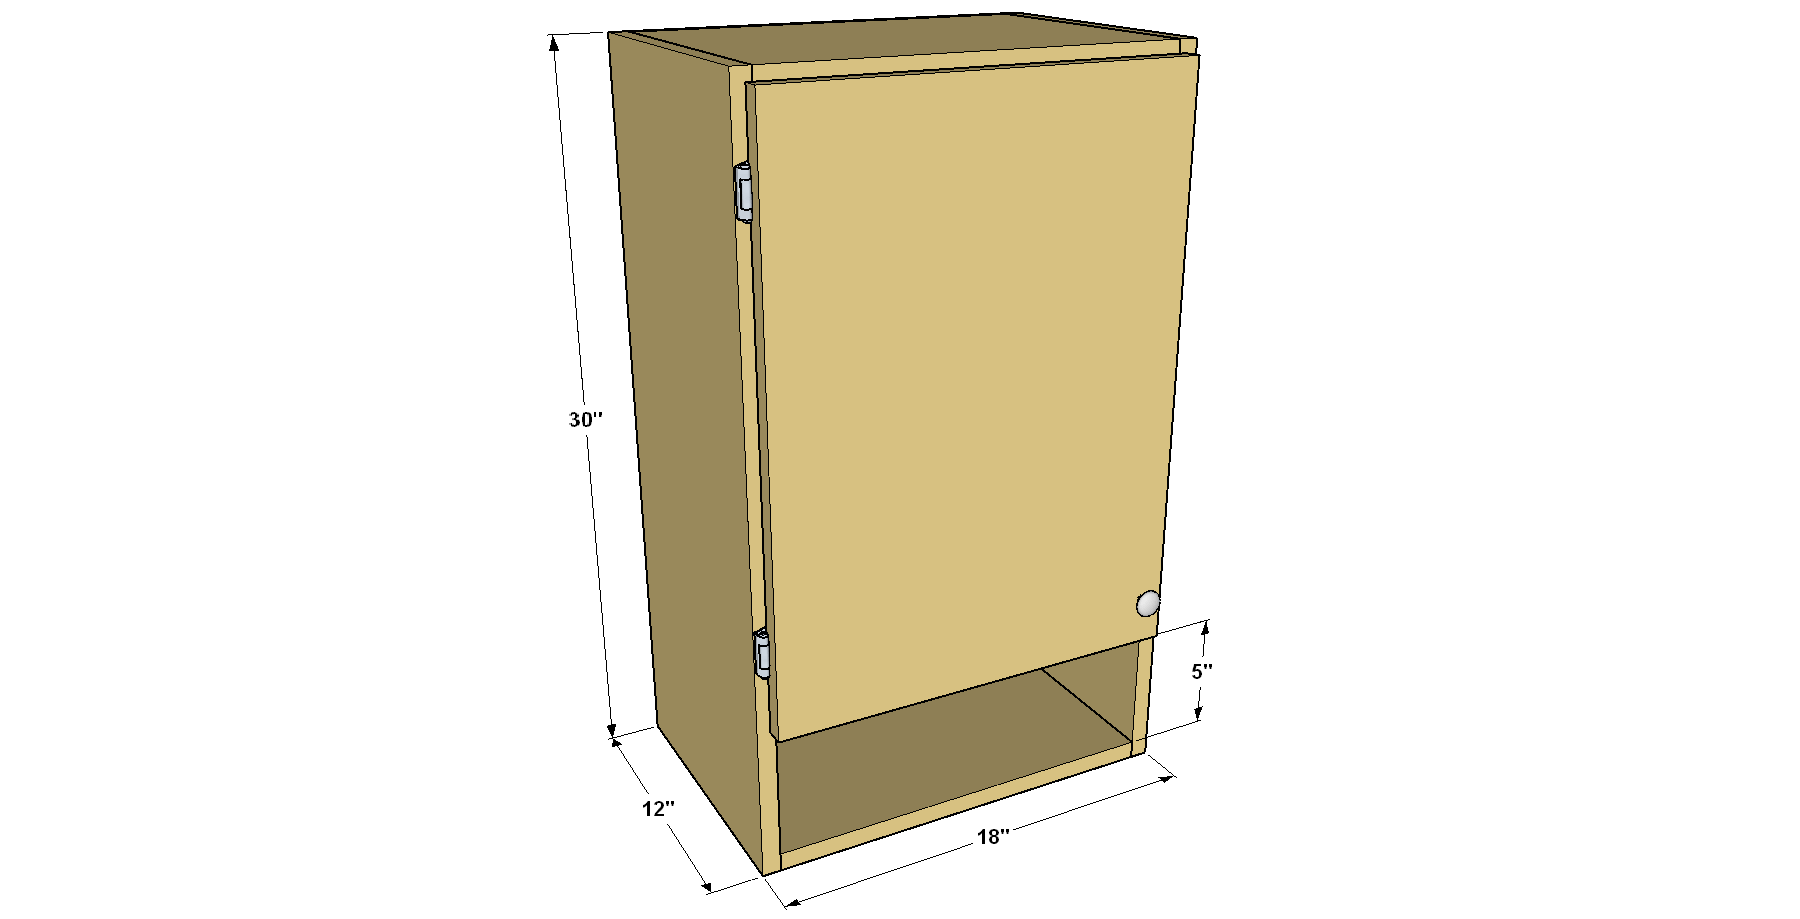
Enhance your workshop or garage storage with this straightforward wall cabinet design, featuring both enclosed storage with an adjustable shelf and an open storage area. Constructed from a half sheet of plywood, a piece of hardboard, and a short 1x4, this cabinet is assembled using pocket hole screws for a secure fit.

Materials Needed:
Plywood:
- 3/4" (19.05 mm) thick for the sides, top, bottom, shelves, and doors.
- 1/4" (6.35 mm) thick for the back panel.
Hardware:
- Kreg Pocket-Hole Screws (1 1/4" or 31.75 mm and 2" or 50.8 mm).
- Wood glue.
- Screws for mounting the cabinet to the wall (optional, depending on your design).
- Hinges and handles for the doors (if adding doors).
Finishing Materials:
- Paint or stain.
- Screen molding (optional, for a finished edge).
Tools Required:
- Circular saw or table saw.
- Drill with Kreg pocket-hole jig.
- Brad nailer (for attaching back panel and moldings).
- Sandpaper or orbital sander.
- Paintbrushes or rags for finishing.
Cut List:

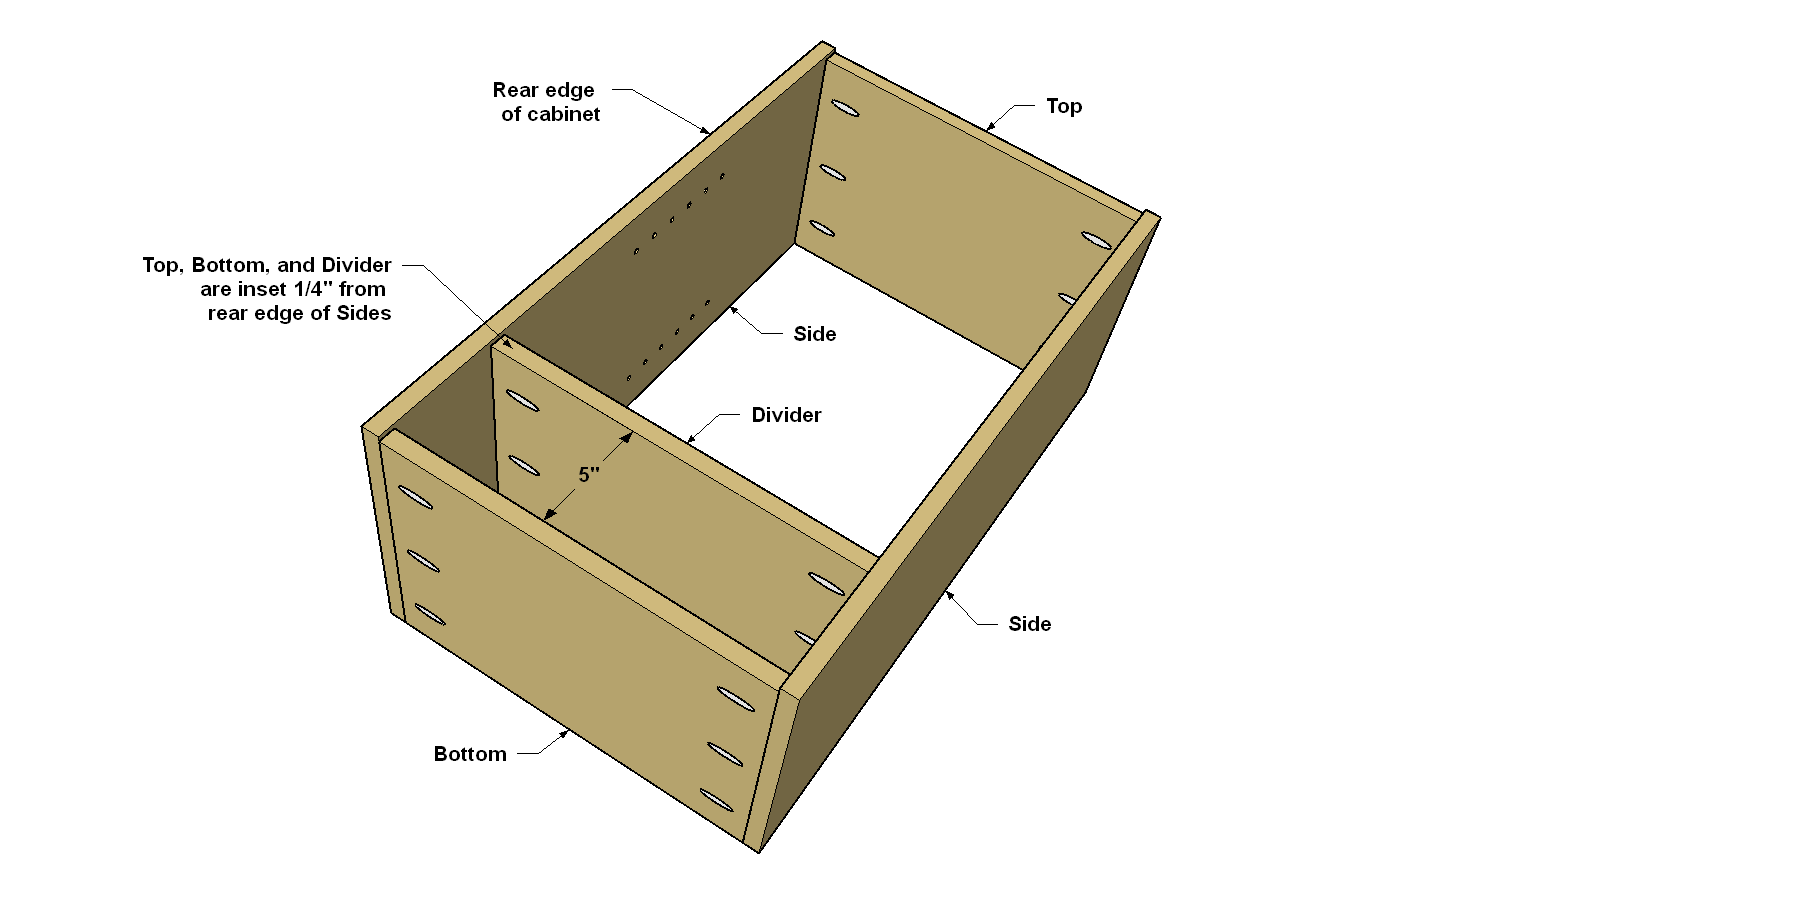
Sides:
- 2 pieces at 18" x 30" (457 mm x 762 mm).
Top and Bottom:
- 2 pieces at 18" x 24" (457 mm x 610 mm).
Shelves:
- 2 pieces at 18" x 24" (457 mm x 610 mm).
Back Panel:
- 1 piece at 24" x 30" (610 mm x 762 mm).
Optional Doors:
- 2 pieces at 12" x 24" (305 mm x 610 mm).
Assembly Steps:
Cut the Pieces:
- Cut all plywood pieces according to the dimensions provided above.
Drill Pocket Holes:
- Using the Kreg pocket-hole jig, drill pocket holes in the edges of the top, bottom, and sides where they will be joined.
Assemble the Frame:
- Attach the top and bottom pieces to the side panels using 1 1/4" (31.75 mm) Kreg pocket-hole screws. Ensure everything is square and flush.
Attach the Back Panel:
- Secure the 1/4" (6.35 mm) plywood back panel to the back of the frame using wood glue and brad nails. This will add structural integrity to the cabinet.
Install the Shelves:
- Decide on the shelf positions and drill pocket holes along the sides of the cabinet. Install the shelves at the desired height using screws or adjustable shelf pins.
Optional Doors:
- If adding doors, attach hinges to the sides of the cabinet and secure the doors in place.
Finish the Cabinet:
- Sand all surfaces smooth and apply paint or stain as desired.
Mounting:
- Use screws to mount the cabinet to the wall. Depending on the design, you can either mount it on a horizontal rail or directly to the studs in the wall.
Optional Customizations:
Adjustable Shelves:
- Use shelf pins or brackets to make the shelves adjustable.
Doors:
- Add cabinet doors for a more enclosed design.
Drawers:
- Incorporate drawers at the bottom for additional storage options.
Tool Hooks:
- Install small hooks inside for hanging tools or accessories.
This plan should provide a solid foundation for building a functional and sturdy wall cabinet for your workshop.
Share:
DIY Lazy Susan Garage Storage Cabinet