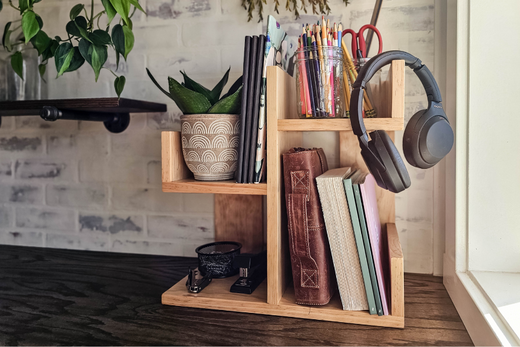
Úselo en la oficina, la cocina o el baño.

¡Organiza tu escritorio con esta pequeña estantería! También puedes usarla en la encimera del baño o la cocina para controlar el desorden. Este sencillo proyecto de una sola tabla se puede hacer en un día y es un regalo ideal.
Dificultad: FÁCIL
Materiales :
Productos de madera
- Pino Premium (1) – 1x10, 8 pies → 25 mm x 254 mm x 2438 mm
Ferretería y suministros
- 501 1/4" Tornillos para agujeros de bolsillo Kreg
- Pegamento para madera (1)
- Mancha (1)
- Paño para teñir (1)
- Laca en aerosol (1)
- Papel de lija de grano 150 (1)
Lista de cortes y piezas
- 3Lateral del estante, ¾” x 9 1/2” x 3” → 19 mm x 241 mm x 76 mm
- 1Estante inferior, ¾” x 9 1/2” x 7 ⅝” → 19 mm x 241 mm x 194 mm
- 1Estante superior, ¾” x 9 1/2” x 7 ¾” → 19 mm x 241 mm x 197 mm
- 1Pieza central, ¾” x 9 1/2” x 15 ½” → 19 mm x 241 mm x 394 mm
- 1Parte inferior, ¾” x 9 1/2” x 16 ⅛” → 19 mm x 241 mm x 410 mm
- 1Pieza trasera corta, ¾” x 4 ½” x 12” → 19 mm x 114 mm x 305 mm
- 1Pieza trasera alta, ¾” x 4 ½” x 16 ¼” → 19 mm x 114 mm x 413 mm

Instrucciones
1 - Cortar madera
Corte la madera de acuerdo con la lista de cortes visuales en los planos de carpintería con una sierra ingletadora para los largos y una sierra de mesa para los cortes al hilo.

2- Perfore agujeros de bolsillo
Perfore agujeros como se muestra en los planos de carpintería.

3- Ensamblar
Con sargentos, fije la pieza inferior y la pieza central con los agujeros pretaladrados y tornillos de 3,8 cm, como se muestra en los planos de carpintería. Unas sargentos grandes ayudan a mantenerlas juntas durante la fijación. A continuación, fije ambos estantes a la pieza central con tornillos. A continuación, sujete con sargentos y fije cada lateral del estante con tornillos, como se muestra en los planos de carpintería. Por último, sujete con sargentos y fije las dos piezas traseras utilizando los agujeros pretaladrados en la parte inferior de los estantes y la pieza inferior.

4 - Hacer tapones para los agujeros de bolsillo y rellenarlos
Si tiene tapones prefabricados a juego, péguelos. Si los está haciendo con la guía de perforación de corte de tapones personalizada, primero perfore los tapones en el material de pino extra premium y luego péguelos en su lugar.

5 - Lijar y teñir
Una vez seco el pegamento, lija todo con papel de lija de grano 150. Quita el polvo del organizador de escritorio y tíñelo con el color de tinte que prefieras.

6 - Sello
Por último, selle con laca después de que la mancha se haya secado completamente.


Compartir:
Tocador de baño pequeño: gabinete de caña