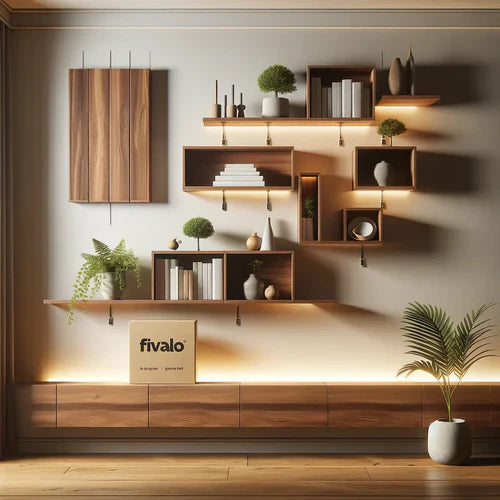
Floating shelves are a perfect way to blend modern design with functionality. They create an illusion of shelves "floating" on the wall, giving your space a clean and uncluttered look. Whether you're looking to display décor, books, or plants, this step-by-step guide will help you create stunning DIY floating shelves that combine style and utility.
Why Choose Floating Shelves?

-
Modern Aesthetic
The sleek, bracket-free appearance adds sophistication to any room. -
Space-Saving
Ideal for small areas or to make walls more functional. -
Customizable
Tailor the dimensions, finishes, and wood type to match your decor.
Materials and Tools
Materials

- Wood Planks: Select sturdy, high-quality wood like oak, pine, or birch (dimensions: 2 inches thick, 6-10 inches deep, and your preferred length, e.g., 24-48 inches; approximately 50 mm thick, 150-250 mm deep, and 600-1200 mm long).
- Hidden Brackets: Opt for heavy-duty, wall-mountable brackets designed to remain invisible (available at hardware stores or online, such as the Fivalo Woodworking Store).
- Wood Screws: Ensure compatibility with your chosen brackets.
- Sandpaper: Medium (120-grit) and fine (220-grit).
- Wood Stain or Paint: Choose a durable finish for long-lasting appeal.
- Polyurethane Topcoat: For added protection against moisture and wear.
Tools

- Drill
- Level
- Stud Finder
- Measuring Tape
- Screwdriver
- Saw (if resizing wood)
Step-by-Step Instructions
1. Plan and Measure

Decide where you want your shelves and how many you'll install. Mark the desired placement on your wall. Use a level to ensure accuracy, and measure the width to ensure the wood planks fit perfectly.
- For consistency, keep the shelves about 12 inches (300 mm) apart vertically.
- Depth: Standard depths are 6-10 inches (150-250 mm) to accommodate most items without protruding.
2. Cut and Prepare the Wood

If necessary, cut the wood planks to your desired length. Sand each piece thoroughly with 120-grit sandpaper to remove rough edges, then finish with 220-grit for a smooth surface.
3. Stain or Paint the Wood
 Apply your chosen wood stain or paint for a professional look. Follow the instructions for drying time and consider applying two coats for richer color. Finish with a polyurethane topcoat to protect the wood.
4. Install the Hidden Brackets

- Use a stud finder to locate wall studs, ensuring your shelves can support weight.
- Drill pilot holes into the wall studs and mount the brackets securely using a drill and screws.
- Double-check with a level to ensure the brackets are perfectly horizontal.
5. Attach the Shelves

Slide the wooden planks onto the brackets. Depending on the design, you may need to secure the shelves with additional screws or adhesive for stability.
6. Decorate and Enjoy

Once installed, style your shelves with books, plants, or decorative items. Keep the arrangement balanced for a minimalist aesthetic.
Tips for Success

-
Choose Quality Materials
Fivalo Woodworking Store offers premium tools and hardware, ensuring durability and style. -
Test Weight Capacity
Before finalizing, test the shelves to ensure they can hold the intended weight. -
Maintain Alignment
Use a level at every stage to avoid crooked shelves.
Welcome to fivalo

Ready to build your dream Floating Shelves? Start with the best tools and materials from Fivalo!
- Exclusive Offer: Get 10% off your first purchase with code CRAFT10.
- Visit Fivalo’s Online Store to browse their premium woodworking supplies.
Conclusion
 DIY floating shelves are a fantastic way to enhance your space with a touch of modern elegance. With the right materials, tools, and a little patience, you can create custom shelving that perfectly suits your needs. Visit the Fivalo Woodworking Store for top-quality supplies to bring your vision to life.
FAQs

Q1. What type of wood is best for floating shelves?
High-quality options like oak, birch, or pine are ideal. They provide strength, durability, and a clean finish.
Q2. How much weight can floating shelves hold?
When installed properly into wall studs, floating shelves can support up to 50-100 pounds, depending on the brackets and materials used.
Q3. Can I install floating shelves without wall studs?
Yes, but you'll need specialized wall anchors designed for drywall to ensure secure installation.
Q4. What tools are necessary for DIY floating shelves?
Essential tools such as a drill, level, stud finder, measuring tape, saw, and screwdriver are indispensable for this project. You can conveniently find all these high-quality tools at the Fivalo Woodworking Store.
Q5. How do I maintain floating shelves?
Dust regularly and avoid overloading. For wooden shelves, reapply a protective finish every few years.
Q6. Can I adjust the size of floating shelves?
Yes, you can cut the wood planks to any length or depth to fit your space perfectly.
Share:
Comprehensive Wooden Coffee Table Plan (Inches & Millimeters)