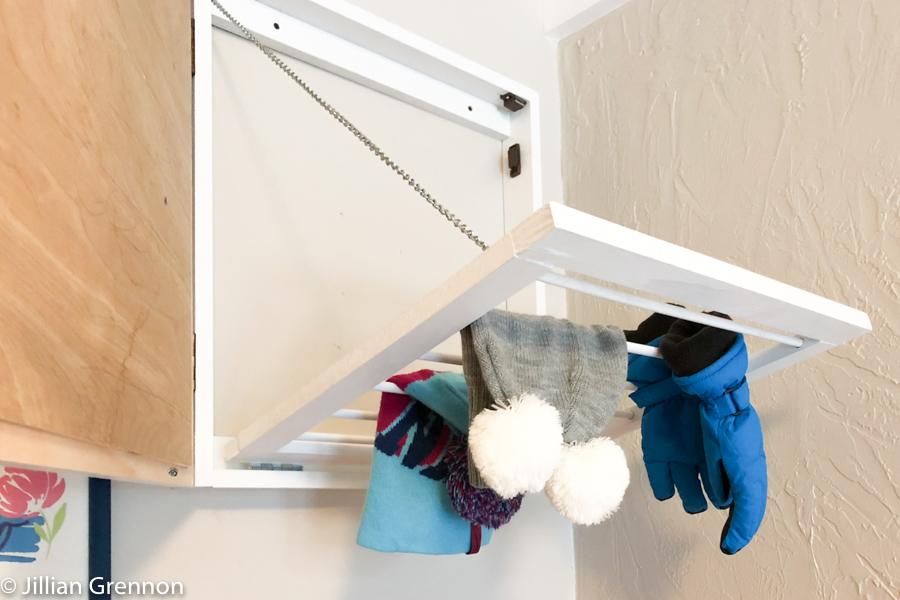
Se acerca el invierno y eso significa guantes mojados, gorros cubiertos de nieve y bufandas empapadas. Es una temporada de desorden, pero eso no significa que tengas que dejar que el caos se apodere de tu casa. Nuestro audaz aventurero se enfrentó al mismo dilema: una casa llena de ropa de invierno húmeda que abarrotaba el recibidor. Pero en lugar de rendirse ante el desorden, decidió tomar las riendas y crear un tendedero oculto.
¿Por qué un tendedero oculto?
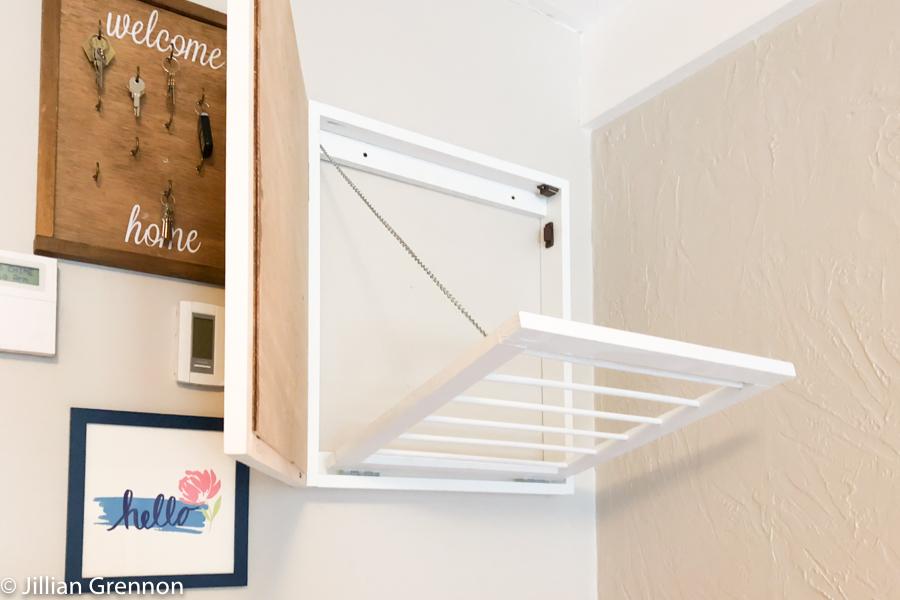
¿Por qué conformarse con un recibidor desordenado cuando puedes tener un espacio elegante y organizado? Nuestro aventurero sabía que un tendedero oculto era la solución perfecta para mantener el caos a raya. Al crear un espacio para que los niños colgaran su ropa mojada, pudieron mantener el orden y la limpieza en casa.
Cómo crear tu propio tendedero oculto

¿Listo para este reto? ¡Descubre cómo crear tu propio tendedero oculto!
Materiales
Productos de madera:
- 3 clavijas – 3/8" incógnita 48" (10 mm x 1219 mm)
- 1 tablero – 1x3 x 96" (25 mm x 76 mm x 2438 mm)
- 1 madera contrachapada – 1/4" Grueso, cuarto de hoja (6 mm de espesor)
- 2 tableros – 1x2 x 72" (25 mm x 51 mm x 1829 mm)
- 1 tablero – 1x2 x 96" (25 mm x 51 mm x 2438 mm)
Ferretería y suministros:
- 4 bisagras Bisagras duraderas para puertas de gabinetes
- 1 cadena de servicio ligero – 2 pies (610 mm) para soporte
- 2 imanes para puertas de armario – Imanes potentes para un cierre seguro de la puerta
- 1 Caja de 1 1/4" Tornillos de bolsillo Kreg Tornillos de bolsillo de alta calidad para carpintería de madera (32 mm)
- Pegamento para madera – Pegamento para madera de fuerte adhesión para un ensamblaje sin costuras
Lista de cortes y piezas:
- 2 lados de base – 1x3 @ 24" (25 mm x 76 mm x 610 mm)
- 2 Base superior e inferior – 1x3 @ 20" (25 mm x 76 mm x 508 mm)
- 2 montantes de puerta – 1x2 @ 24" (25 mm x 51 mm x 610 mm)
- 2 rieles de puerta – 1x2 a 18 1/2" (25 mm x 51 mm x 470 mm)
- 2 lados de rack – 1x2 @ 17" (25 mm x 51 mm x 432 mm)
- 2 rejillas superior e inferior – 1x2 @ 19" (25 mm x 51 mm x 483 mm)
- 2 soportes de base – 1x2 @ 20" (25 mm x 51 mm x 508 mm)
- 6 clavijas – 3/8" tacos cortados a 18" (10 mm x 457 mm)
- 1 parte trasera de puerta de madera contrachapada – 1/4" madera contrachapada cortada a 22 1/4" x 19 1/2" (6 mm x 565 mm x 495 mm)
Instrucciones
Base:
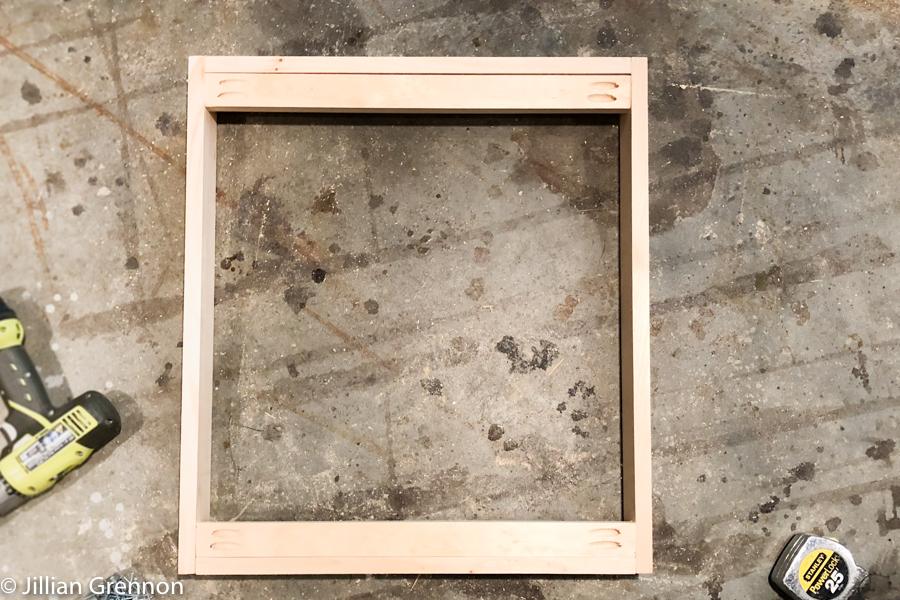
Fije la parte superior e inferior de la base de 1x3 (25 mm x 76 mm) a los laterales (25 mm x 76 mm) con tornillos para agujeros ciegos y cola para madera. Compruebe que estén a escuadra y luego fije los soportes de 1x2 (25 mm x 51 mm) con tornillos para agujeros ciegos y cola para madera. Opté por pintar/teñir cada paso a medida que avanzaba para facilitar las cosas.
Puerta Parte 1:
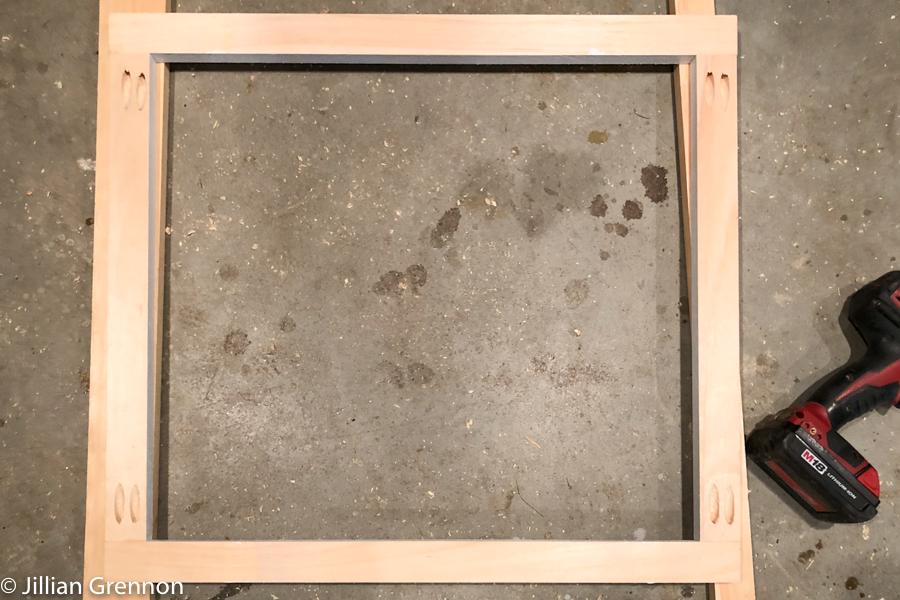
Construya la cara de la puerta uniendo los montantes de la puerta (25 mm x 51 mm x 610 mm) a los rieles de la puerta (25 mm x 51 mm x 470 mm) usando tornillos de bolsillo y pegamento para madera.
Puerta Parte 2:
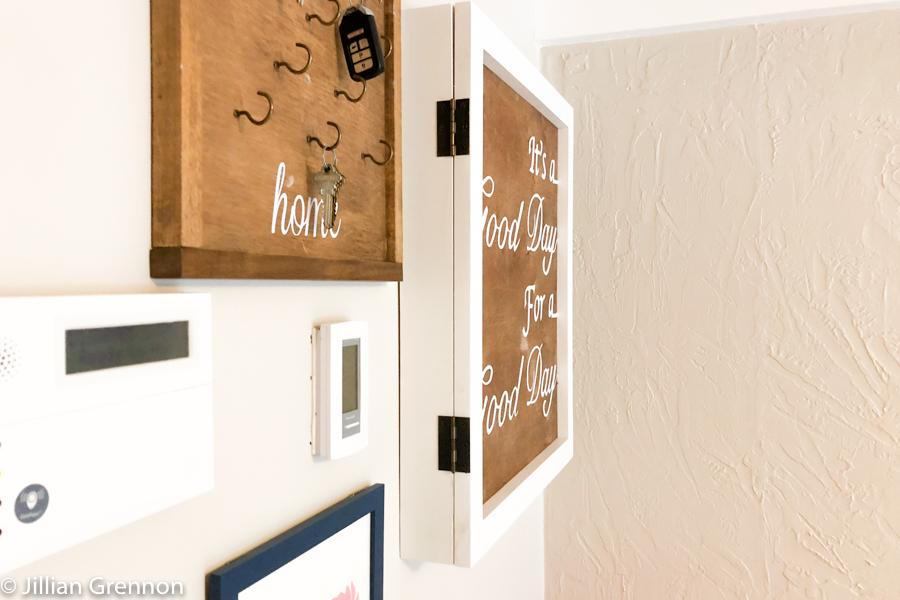
 Pega y clava tu 1/4" Fije madera contrachapada de 6 mm a la parte trasera del marco de la puerta con una clavadora y clavos pequeños. Puede decorar la puerta a su gusto para que combine con su decoración. Fije la puerta a la base con dos bisagras.
Montaje del bastidor:
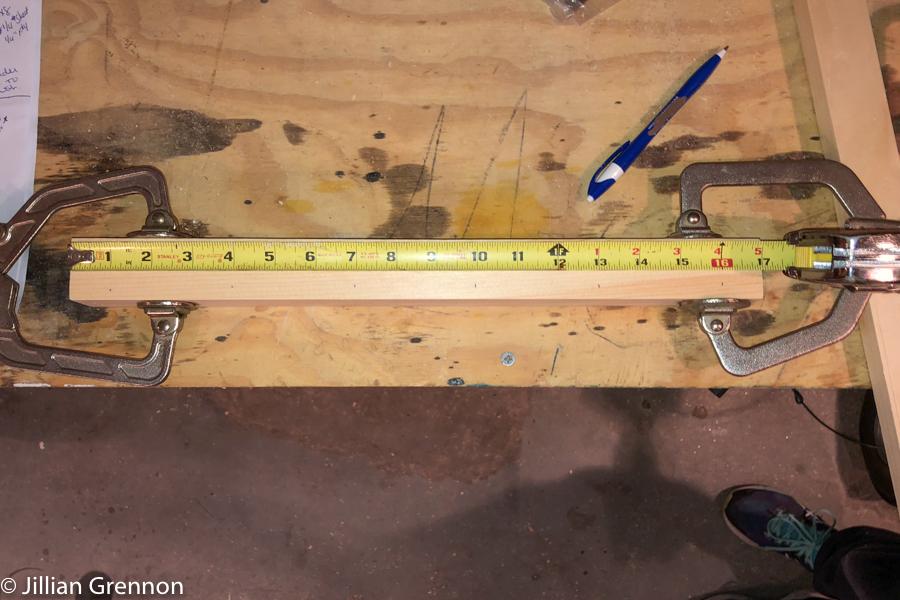
Para crear su tendedero, comience perforando 6 agujeros en el 3/4" (19 mm) del borde de cada tabla lateral del bastidor con una sierra de 3/4"8" Broca de 10 mm. Asegúrese de que los agujeros estén alineados uniformemente en ambas tablas. Para mayor precisión, puede envolver la broca con cinta aislante. 1" (25 mm) desde la punta, como marcador visual de la profundidad de perforación. Espacié mis agujeros comenzando 1" (25 mm) desde el extremo, con cada orificio posterior colocado 3" (76 mm) de distancia.
Añadir pasadores:
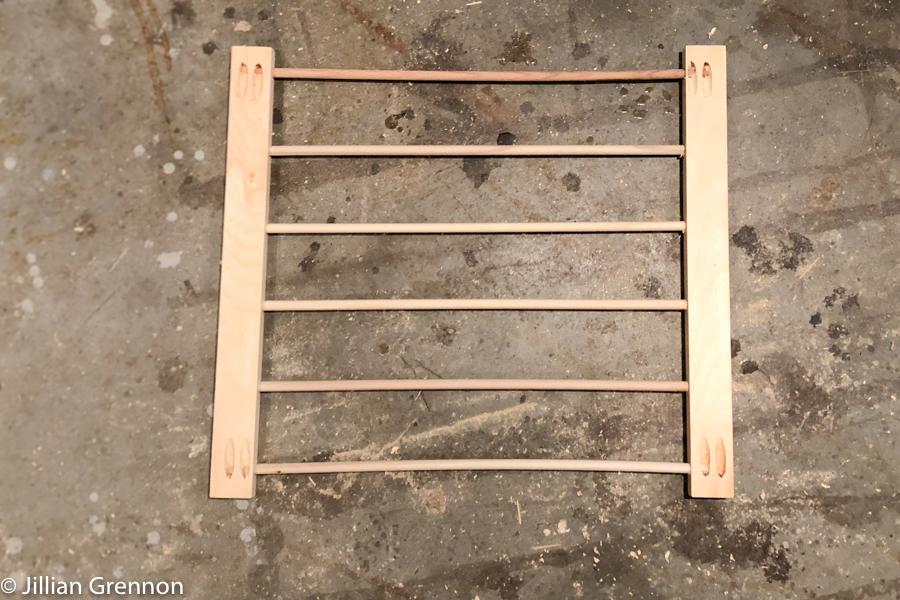
Aplique pegamento para madera en cada agujero e inserte las clavijas. Use un mazo de goma para golpear suavemente las clavijas en su lugar, asegurándose de que estén bien ajustadas y seguras. Una vez colocadas las clavijas, fije el listón de 1x2x.19" Piezas superiores e inferiores del rack (25 mm x 483 mm), asegurándose de que encajen correctamente.
Fijar el rack:
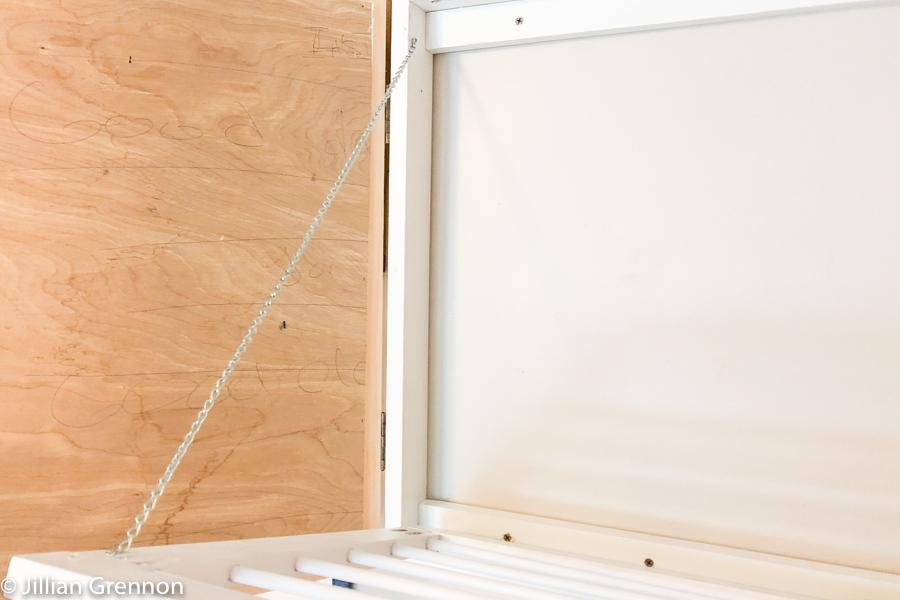
Fije el perchero a la base colocando dos bisagras en la parte inferior. Asegúrese de que las bisagras estén colocadas de forma que el perchero pueda abrirse hacia afuera. Además, instale un soporte para la tapa o una cadena para soportar el peso de la ropa en el perchero, lo que proporciona mayor estabilidad cuando esté abierto.
Añadir imanes:
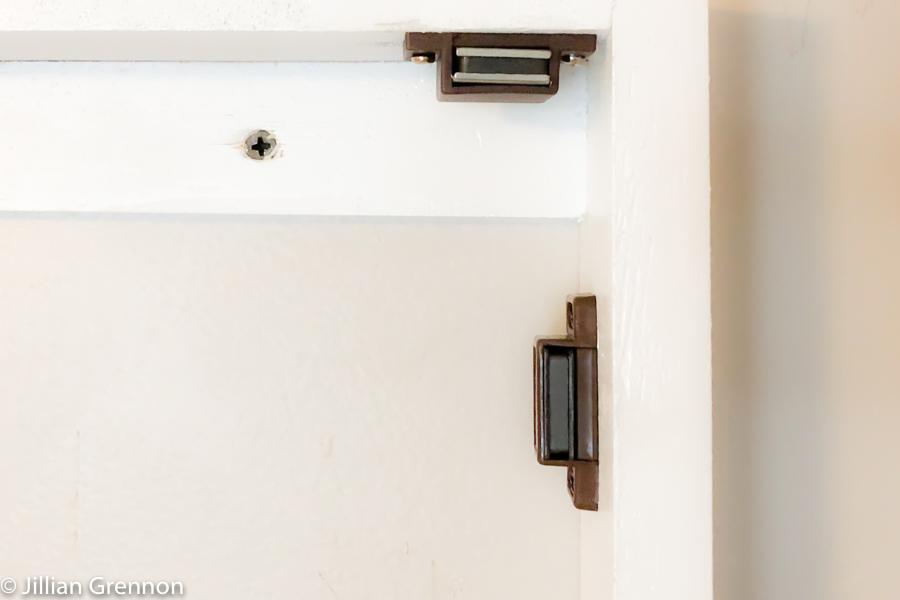
Instale un imán en la puerta para mantenerla cerrada de forma segura. Además, añada otro imán para sujetar el estante cuando no esté en uso, asegurándose de que permanezca en su lugar al plegarlo o guardarlo.
¡Cuélgalo y disfruta!
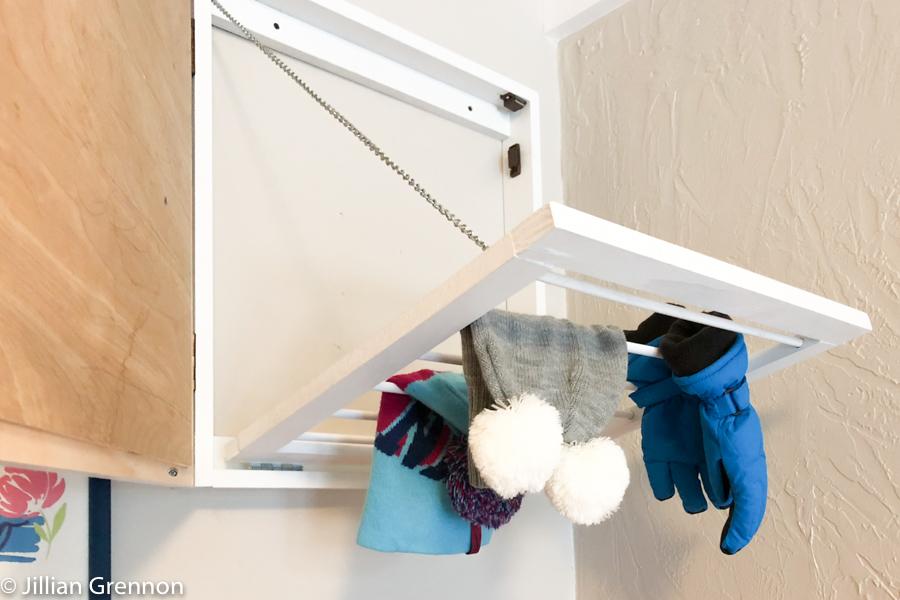
Para colgar el tendedero, introduzca los tornillos en la pared a través de los soportes de la base de 1x2. Asegúrese de anclar los tornillos a los montantes para una sujeción óptima, o utilice anclajes de pared si no dispone de ellos. Una vez montado, ¡solo queda disfrutar de su nuevo tendedero oculto!


Compartir:
La mejor guía para las consolas de madera contrachapada
Organice su espacio: cree un estante de llave oculta